Plant photography among Instagrammers and plant parents everywhere is increasing in popularity. Some call it an obsession, but those of us who adore our plants just love showing them off. Over the last few years, and especially during the pandemic, plant parenting has soared in popularity. As your collection continues growing (literally!), we’re sharing some tips to help you elevate your plant photography to viral-worthy!
The ‘Secret’ of Plant Photography
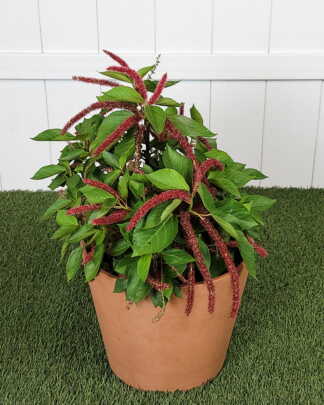
Some may think the secret sauce to photographing plants is by using super expensive cameras. Nope. The camera on your smart phone does the trick. As phone camera technology continues to improve, you have everything you need to unleash your creativity and capture gorgeous shots worth sharing. (All images in this article were taken on a Iphone 11 Pro Max)
Steps to For Your 1st Viral Plant Shoot
Step 1: Focus

Decide on what you want to capture. Zero in on the image you want to photograph. Is it a single plant, your entire collection, an unusual flower on a cactus, the golden light of late afternoon illuminating a corner filled with foliage? Once you’ve envisioned the subject, and understand what you are trying to achieve, you’re ready to take the next step.
Pro Tip: To ensure your picture will be viral-worthy, think of ways to set your shot apart from standard plant images. Try a different angle. Change the perspective. Maybe use sepia tones? This is your time to be creative so that people will stop, look, comment and share!
Step 2: Visualize the Scene
Set the scene for the image you want to capture. Depending on your goal, it is essential to think about backgrounds. Make sure there won’t be any surprises or distractions, such as unwanted cords, dirt on a surface, a coffee cup. Once you feel you have the optimum background for your shot, feel free to add some props as a way to add interest. Try something with a bold pop of color or something with interesting angles.
Now that your background is complete, think about making your plant(s) stand out. Start by removing any unwanted weeds or crispy foliage. To maximize your plants’ beauty, give them a light wipe down to remove dust. A gentle misting also helps show off foliage.
Step 3: Lighting

Your best bet when taking plant pictures is to go for light as natural as possible. To be frank, artificial lighting tends to wash out the vibrancy of what you’re trying to capture. Professional photographers don’t usually point their lighting directly at the subject. They prefer to have the light coming from behind or from the side.
Pro Tip: When using your smart phone, you can tap the screen to adjust the brightness and focus of your image. Remember, do NOT zoom in too closely on an image. You can crop and adjust later for sharpness and picture quality.
Step 4: Instagrammable Edits
Editing may feel daunting, but it’s actually easy. Don’t over edit. Strive to keep your image as natural as possible. Just because your phone camera has lots of features, doesn’t mean you have to use them all. Your editing goal is to accentuate what you’ve taken, not to overshadow.
Our favorite editing tools are Lightroom, or those found in the Instagram’s app. Utilizing Lightroom is easy. While we suggest using the Instagram app for a quick edit, if your image needs more help, get to know Lightroom and its suite of tools. They can give your image that professional look. Plus, as you continue to become a Lightroom pro, you can create your own presets & more!
Step 5: Cropping Your Images
It’s always best to crop your images. Instagram prefers a 1:1 posting ratio (1080×1080), but does also allow a 4:5 posting ratio (1080×1350). Crop your image before or after editing.
Ready, Set Post!

Now that you’ve created some amazing viral-ready plant shots, it’s time to get them out there! As you craft your post, get creative – it’s your time to shine. Your post can be as short or as long as you want. Trust us, we’ve seen them all.
After you’ve captioned your post, we suggest using hashtags that relate to what you’re posting. This can be a mix of popular and not-so-popular tags, but make sure they stay relative to the image. On Instagram, you can add up to 30 hashtags. (Don’t add more – just one over and Instagram will remove your caption, and it’s back to the beginning for you.) Don’t just think plant hashtags, think of other tags relative to your setting. For example: if we posted a picture on a Monday of a Monstera Deliciosa in a bohemian-themed living environment, we may use varied tags like: #MonsteraMonday #BohoChic #Monstera #InteriorDesign #PlantStyle
Before hitting the share button, take a moment to re-read your post for any grammatical or spelling errors. This will polish your presentation and prevent a missed opportunity to add any final things you wanted to convey.
Pro-Tip: Make sure to tag @plantvine in any image of your plants/products shipped to your door by us. We love seeing & sharing our green babies in their new homes across the world!
Time to post – take a deep breath and hit that share button! Now your post is out there and ready to be seen by your family, friends and the plant-loving world.
Share, Share, Share
After the post is up, take a quick moment to add it to your Insta-Story to let your followers know you have new content up. You may also want to share your post on your Facebook page. Let’s face it, not everyone is on Instagram.